Plugin: Google Cloud Build and Storage
The Singularity Registry client allows for a large set of options for external storage endpoints. Specifically, this plugin uses storage and build provided by Google, meaning:
Other cloud vendors have been included with sregistry client (AWS, S3, Minio) and equivalent build and storage pairs can be added here. If you would like to discuss adding a builder and storage pair, please open an issue.
Don’t forget to go back to the install docs where you left off. This quick start will walk through setting up custom storage using Google Cloud Build and Google Storage as an endpoint.
Configure sregistry
By default, google build is disabled. To configure sregistry to use Google Cloud build and Storage, in settings/config.py you can enable the plugin by uncommenting it from the list here:
PLUGINS_ENABLED = [
#    'ldap_auth',
#    'saml_auth',
#    'globus',
     'google_build'
]
You will need to build the image locally with, at least, the build argument ENABLE_GOOGLEBUILD set to true:
$ docker build --build-arg ENABLE_GOOGLEBUILD=true -t ghcr.io/singularityhub/sregistry .
Secrets
Next, set the following variables in shub/settings/secrets.py,
that you can create from dummy_secrets.py in the shub/settings folder.
The first two speak for themselves, your project name and path to your
Google Application Credentials.
Project Identifiers
# =============================================================================
# Google Cloud Build + Storage
# Configure a custom builder and storage endpoint
# =============================================================================

# google-storage, s3, google-drive, dropbox
GOOGLE_APPLICATION_CREDENTIALS=/path/to/credentials.json
SREGISTRY_GOOGLE_PROJECT=myproject-ftw
You can create custom Google Application Credentials for your server in the browser, and it will be enough to make the service account a project owner. To allow for signed urls, you will need to also add iam.serviceAccounts.signBlob to the permissions. This is associated with the role “Service Account Token Creator” and I’ve added it in the past by going to IAM and Admin -> IAM and then selecting the service account and searching for that role. Yes, it’s sort of annoying to get working the first time. ;/
If you are on a Google Cloud instance you can scp (with gcloud) using the command line as follows:
$ gcloud compute scp [credentials].json $USER@[INSTANCE]:/tmp --project [PROJECT]
Keep in mind that the path to the Google credentials file must be within the container (/code is the root folder that is bound to the filesystem).
Build Caching
SREGISTRY_GOOGLE_BUILD_CACHE="true"
If you set this variable (to anything), it means that after build, you will not delete intermediate dependencies in cloudbuild bucket (keep them as cache for rebuild if needed). This defaults to being unset, meaning that files are cleaned up. If you define this as anything, the build files will be cached.
Build Limit
SREGISTRY_GOOGLE_BUILD_LIMIT=100
To prevent denial of service attacks on Google Cloud Storage, you should set a reasonable limit for the number of active, concurrent builds. This number should be based on your expected number of users, repositories, and recipes per repository.
Singularity Version
By default, we use the default version that is set by the Google Build client that belongs to Singularity Registry Client. However, as this value is subject to be updated, we recommend that you set it in your secrets and can then decide when you want to update.
SREGISTRY_GOOGLE_BUILD_SINGULARITY_VERSION="v3.2.1-slim"
The version must coincide with a container tag hosted under singularityware/singularity.
Storage Bucket Name
By default, the bucket name will be called sregistry-gcloud-build-[hostname], and since
your host is a docker container, that will resolve to a random set of numbers and
letters. For this reason, we strongly recommend you set a consistent hostname.
If you do not and need to remove and bring up the containers again, the bucket
metadata will not match the new bucket name. Here is an example of how to set a custom name:
SREGISTRY_GOOGLE_STORAGE_BUCKET="taco-singularity-registry"
Additionally, a temporary bucket is created with the same name ending in _cloudbuild. This bucket is for build time dependencies, and is cleaned up after the fact. If you are having trouble getting a bucket it is likely because the name is taken,
and we recommend creating both [name] and [name]_cloudbuild in the console and then setting the name here.
Build Timeout
The number of seconds for the build to timeout. If set to None, will be 10 minutes. If
unset, it will default to 3 hours. This time should be less than the SREGISTRY_GOOGLE_BUILD_EXPIRE_SECONDS. If
you want to use the default, don’t define this variable in your secrets.
# SREGISTRY_GOOGLE_BUILD_TIMEOUT_SECONDS=None
Signed URL Expiration
By default, the containers are made private, and then granted access via signed urls. You can optionally adjust the time that the URL will expire in, although it’s recommended that this is kept small:
CONTAINER_SIGNED_URL_EXPIRE_SECONDS=10
This can be much smaller than 10, as we only need it to endure for the POST. I’ve tested and found that 3-5 seconds is about right.
Build Expiration
You must define the number of seconds that your build expires in, meaning that it would no longer be accepted by the server.
SREGISTRY_GOOGLE_BUILD_EXPIRE_SECONDS=28800
The default provided in the dummy secrets, shown above, would indicate 8 hours.
Disable Github
If you need to globally disable GitHub, meaning that users cannot make new collections and webhooks are disabled, you can do that:
DISABLE_GITHUB=True
Disable Building
Disable all building, including pushing of containers and recipes. By default, for a working registry, this should be False.
DISABLE_BUILDING=True
This setting is also in the main settings page, but mentioned here for Google Cloud Build.
Disable Build Receive
Prevent responses from being received from Google Cloud Build (returns permission denied).
DISABLE_BUILD_RECEIVE=True
These variables are written in detail in the dummy_secrets.py file. If you need more information, you can read the Google Cloud Build page.
If you are missing some variable, there will be an error message on interaction with the Google Cloud Build API since you won’t be able to authenticate. Once your settings are ready to go, you will want to continue with the install docs where you left off, and you can continue here after you’ve done:
$ docker compose up -d
and confirmed the registry running at localhost, and also have logged in (so you have an account with permission to push containers and recipes.)
Singularity Registry Client
If you haven’t yet, you will need the sregistry client in order to push recipes to build with Google Cloud Build. The minimum version that supports this
is 0.2.19. An easy way to install is any of the following:
$ pip install sregistry[google-build]
$ pip install sregistry[google-build-basic] # without local sqlite database
Next, export the client to be your registry.
$ export SREGISTRY_CLIENT=registry
If you are reading here from the installation docs, you likely haven’t brought up your registry and should return there where you left off.
Building Containers
There are two ways to trigger builds:
- Automated trigger from GitHub webhooks
- Manual push of a recipe
The recommended approach is to enable GitHub authentication and then have pushes to your repository trigger builds. For the second approach, while you can upload a recipe directly, it is not recommended as it doesn’t have the recipe kept under any version control.
Trigger from Github
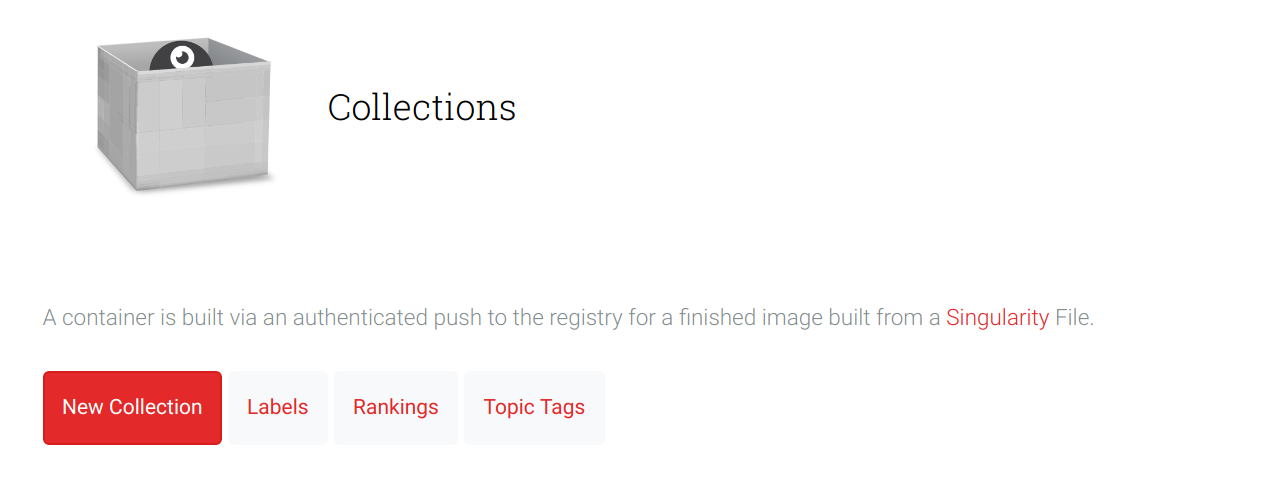
You will first need to log in with GitHub, and then navigate to the container collections page (the “Containers” link in the navigation):
If the Google Build plugin is correctly enabled, you’ll see a second option on the right:
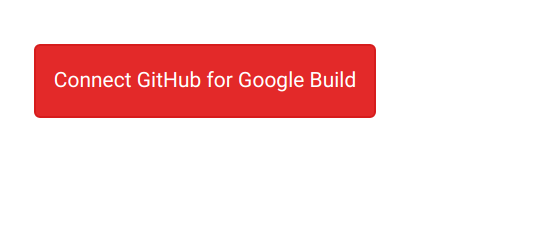
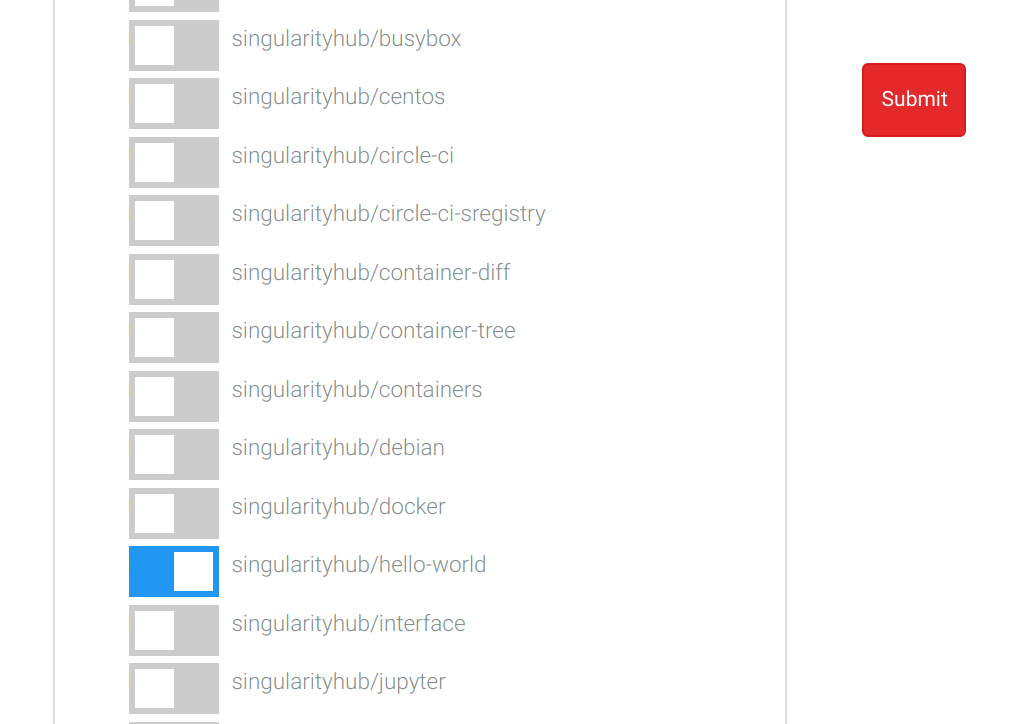
Select this, and your repositories (and organizations) that you granted permission to connect to will show up. You can select one:
Once you’ve connected the repository, an initial build will build
the latest version of the recipes that are discovered. Any recipe that
is in the format Singularity.<tag> or just Singularity (tag defaults
to latest) will be built.
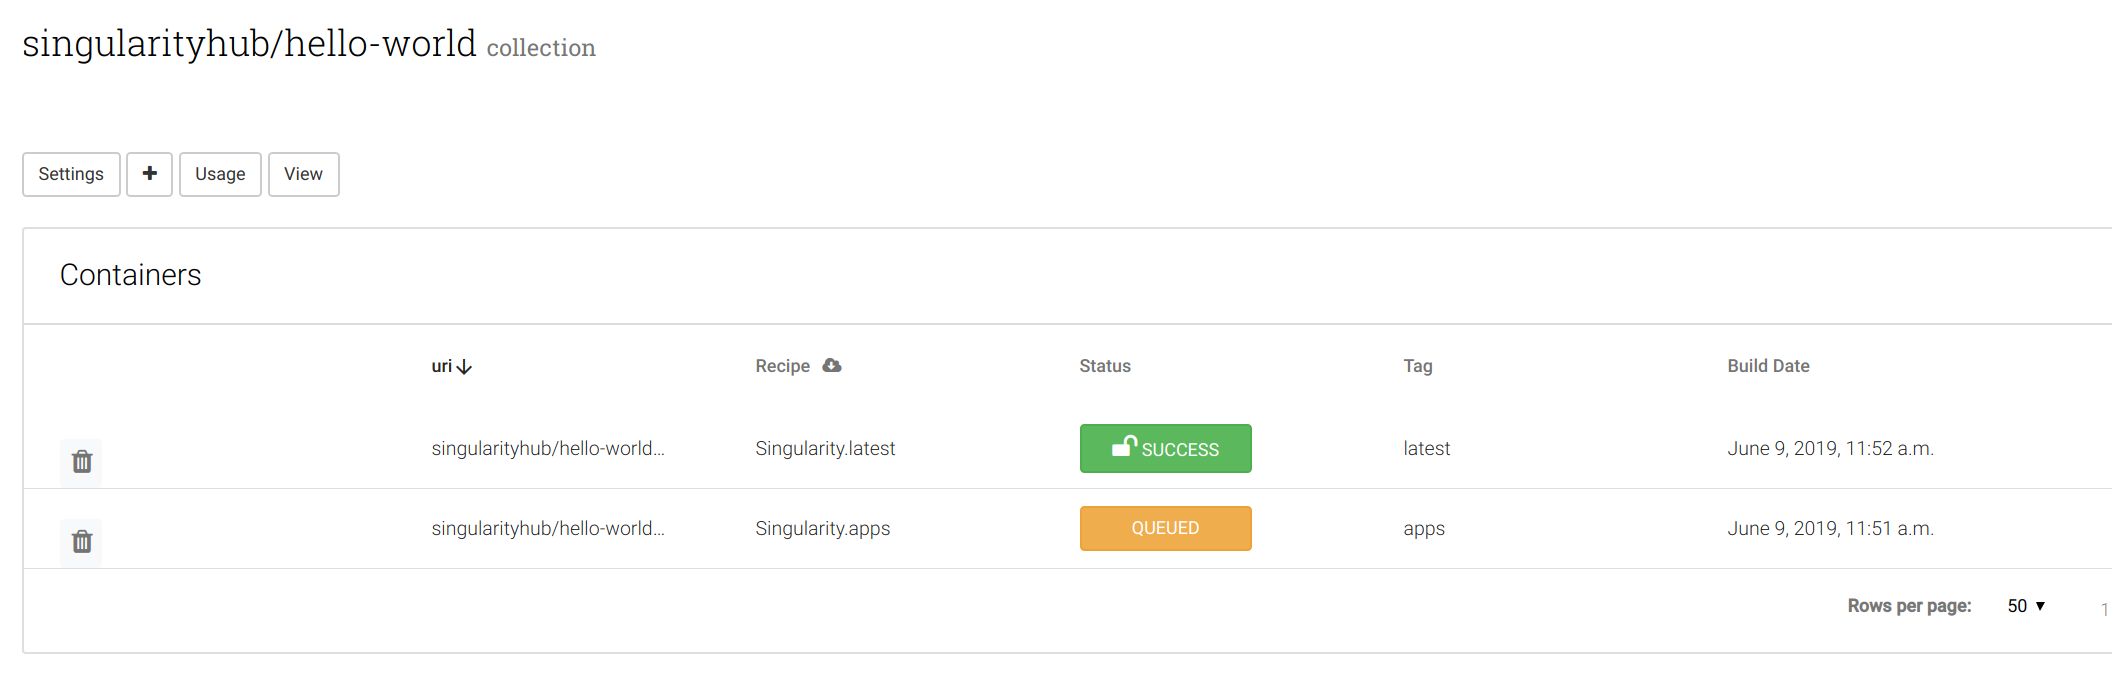
If you have two recipes named equivalently in different folders, the recipe that was more recently updated will be used.
Push a Recipe
When the server is started and the client is ready, it’s time to push a recipe to build! By default, you will need to specify the name of the collection and container, and to include the fact that you want to use Google Cloud Build. You’ll need to install Singularity Registry Client version 0.2.21 or later:
$ pip install sregistry[google-build]>=0.2.21
$ pip install sregistry[google-build-basic]>=0.2.21 # without local database
Then to submit a build, you’ll need to grab your credentials from https://
$ sregistry build --name registry://collection/container:tag Singularity --builder google_build
Notice that we specify the builder to be “google_build.” Also notice that the command simply requires a name for your collection (it doesn’t need to exist, but you need push access and to have exported your token to your local machine.
If you get this error:
[================================] 0/0 MB - 00:00:00
Recipe upload failed: 403 Client Error: Forbidden for url: https://containers.page/google_build/build/.
you forgot to create a collection called “collection” and need to make it in the interface before proceeding.
Pull Containers
Once you have a container, you of course want to pull it! You can use
the Singularity Client to do this. Let’s say that our server is at https://www.containers.page:
$ singularity pull shub://containers.page/singularityhub/hello-registry:latest
 760.00 KiB / 760.00 KiB [=========================================================================================] 100.00% 5.22 MiB/s 0s
And there you have it!
$ ls
hello-registry_latest.sif

$ singularity run hello-registry_latest.sif
Tacotacotaco!
Note that having a custom registry name (containers.page, in the above example) was a bug in early versions of Singularity 3.x. if you have trouble with this command, you will need to upgrade Singularity.
You can technically also just pull it with simple bash commands, if you don’t want to rely on Singularity.
$ wget $(curl https://containers.page/api/container/singularityhub/hello-registry:latest | jq --raw-output .image)
If you want to pull with Singularity (but get the error) you can also do this:
$ singularity pull $(curl https://containers.page/api/container/singularityhub/hello-registry:latest | jq --raw-output .image)
Finally, it should be pointed out that you can use the Google Builder integration from your command line without having a registry at all. Singularity Registry Client can serve to build and then pull the image on its own.