Settings
As of version 2.0.0 we have one core settings.py file
that can be populated in several ways:
- Directly in the file (e.g., if you build your own base container)
- From the environment (described below with a
SREGISTRY_prefix - From a config file,
settings.yamlin the root directory of your server OR custom set atSREGISTRY_SETTINGS_FILE
Order of preference or variables honored is:
- secrets.py
- the environment
- settings.yaml
- defaults directly in settings.py
E.g., anything you define in a secrets.py takes first preference, followed by the environment, then a settings.yaml, and lastly, the defaults directly in settings.py. Since secrets is imported at the end (after we have defined some new settings in nested data structure) to completely over-ride these data structures (e.g., the DATABASE variable) you can define the entire thing again in your secrets.py.
You will want to choose a strategy that works for your deployment, and then tweak the values to your liking before we start the application. For example, if you are running sregistry on a filesystem directly that you can access, you can easily write secrets into either:
- A
secrets.pyin theshub/directory alongside settings and you can use the dummy_secrets.py as a starter template. - A
settings.yamlin the root directory of your application (or set atSREGISTRY_SETTINGS_FILEand you can use the dummy-settings.yaml as a starter template.
If you are deploying via Kubernetes or similar, you can either choose to define secrets entirely in the environment, or you can have one of these files added via a config map or similar (or some combination of those two things).
Environment
As of version 2.0.0, you can set any configuration value from settings in the environment to override the settings value.
To determine the value for the environment variable, if it isn’t already defined in the environment (e.g., MINIO_SECRET)
you can add the SREGISTRY_ prefix to derive it. This means:
- A setting like
ENABLE_GOOGLE_AUTHwould be set asSREGISTRY_ENABLE_GOOGLE_AUTH - To set something to True, you could do
SREGISTRY_ENABLE_GOOGLE_AUTH=TrueorSREGISTRY_ENABLE_GOOGLE_AUTH=true - To set something to False, you could do
SREGISTRY_ENABLE_GOOGLE_AUTH=FalseorSREGISTRY_ENABLE_GOOGLE_AUTH=false - To set an integer value, you could do
SREGISTRY_USER_COLLECTION_LIMIT=100(it will be converted) - To set a string value, simply set it (e.g.,
SREGISTRY_REGISTRY_NAME="Tacosaurus Centers"
Generally, any boolean, integer, or string can be set. For database credentials, the following custom variables are exposed (all strings):
- SREGISTRY_DATABASE_ENGINE
- SREGISTRY_DATABASE_NAME (postgres)
- SREGISTRY_DATABASE_USER (postgres)
- SREGISTRY_DATABASE_HOST (db)
- SREGISTRY_DATABASE_PORT (5432)
And you can set a custom set of comma separated values (in a string) for either of SREGISTRY_ADMINS or SREGISTRY_PLUGINS_ENABLED.
SREGISTRY_ADMINS="adminA,adminB,adminC"
SREGISTRY_PLUGINS_ENABLED="ldap,google-build"
For any setting in the sections below, you can set them in the environment (with SREGISTRY_)
or via the settings.yaml file or the secrets.py. If you choose to use a file (and are working locally) you’ll want to start by copying
either of the templates:
cp shub/dummy_secrets.py shub/secrets.py
cp shub/dummy-settings.yaml settings.yaml
And make sure neither of these files are added to any kind of version control! Each of the settings (optional or required) is explained in more detail in the sections below.
Secrets
Regardless of your approach, you’ll want to set a SECRET_KEY - either directly in secrets.py or settings.yaml or
in the environment as SREGISTRY_SECRET_KEY.
You can use the secret key generator to make a new secret key
Authentication Secrets
One thing I (@vsoch) can’t do for you in advance is produce application keys and secrets to give your Registry for each social provider that you want to allow users (and yourself) to login with. We are going to use a framework called python social auth to achieve this, and in fact you can add a number of providers (I have set up a lot of them, including SAML, so please submit an issue if you want one added to the base proper.). Singularity Registry uses OAuth2 with a token–> refresh flow because it gives the user power to revoke permission at any point, and is a more modern strategy than storing a database of usernames and passwords. You can enable or disable as many of these that you want, and this is done in the settings.py, which is controllable via the environment or a settings.yaml or by editing the file directly. For example, if using the settings.yaml you will want to have at least one of these enabled:
API_REQUIRE_AUTH: false
ENABLE_GOOGLE_AUTH: false
ENABLE_TWITTER_AUTH: false
ENABLE_GITHUB_AUTH: true
ENABLE_GITLAB_AUTH: false
ENABLE_BITBUCKET_AUTH: false
ENABLE_GITHUB_ENTERPRISE_AUTH: false
Note that any of the above can also be set in the environment with the SREGISTRY_ prefix, or you can define Python boolean
values in a secrets.py. You will need at least one to log in. I’ve found that GitHub works the fastest and easiest, and then Google.
Twitter now requires an actual server name and won’t work with localhost, but if you are deploying on a server with a proper domain go ahead and use it. All avenues are extremely specific with regard to callback urls, so you should be very careful in setting them up. If you want automated builds from a repository integration with Google Cloud Build, then you must use GitHub.
Plugins
Other authentication methods, such as LDAP, are implemented as plugins to sregistry. See the plugins documentation for details on how to configure these. You should also now look here to see which plugins you will
want to set up (and then build into your container). You can look at either of the dummy secrets.py or settings.yaml to see the variables that are required (and examples).
For authentication plugins, we will walk through the setup of each in detail here. For other plugins, you should look at the plugins documentation now before proceeding.
Remember, for all of the below, you should put the content in one of:
- your
secrets.py - your
settings.yaml - the environment with a
SREGISTRY_prefix - directly in the file (be careful about adding this to version control!)
Note that if you are deploying locally, you will need to put localhost (127.0.0.1) as your domain, and Github is now the only one that worked reliably without an actual domain for me. For the remainder of this settings document, we will provide examples written to secrets.py.
Google OAuth2
You first need to follow the instructions and setup an OAuth2 API credential. The redirect URL should be every variation of having http/https, and www. and not. (Eg, change around http–>https and with and without www.) of https://www.sregistry.org/complete/google-oauth2/. Google has good enough debugging that if you get this wrong, it will give you an error message with what is going wrong. You should store the credential in secrets.py, along with the complete path to the file for your application:
# http://psa.matiasaguirre.net/docs/backends/google.html?highlight=google
SOCIAL_AUTH_GOOGLE_OAUTH2_KEY = 'xxxxxxxxxxxxxxxxxxxxxx.apps.googleusercontent.com'
SOCIAL_AUTH_GOOGLE_OAUTH2_SECRET = 'xxxxxxxxxxxxxxxxx'
Google is great in letting you specify multiple acceptable callback urls, so you should set every version of http://127.0.0.1/complete/google-oauth2 (I did with and without http/https, along with the ending and without the ending slash, just in case). Note that 1. extra arguments have been added to ensure that users can refresh tokens, and 2. in testing I was using http and not https, and I eventually added https (and so the url was adjusted accordingly). Next, we need to follow instructions for web applications.
Setting up Github OAuth
For users to connect to Github, you need to register a new application, and add the key and secret to your secrets.py file like this:
# http://psa.matiasaguirre.net/docs/backends/github.html?highlight=github
SOCIAL_AUTH_GITHUB_KEY = ''
SOCIAL_AUTH_GITHUB_SECRET = ''
The callback url should be in the format http://127.0.0.1/complete/github, and replace the localhost address with your domain. See the Github Developers pages to browse more information on the Github APIs.
Setting up Github Enterprise OAuth
The GitHub Exterprise docs are here. You will want to register a new application on your instance of GitHub Enterprise in Developer Settings, set the callback URL to “http://example.com/complete/github-enterprise/” replacing example.com with your domain, and then the following environment variables should be defined in your secrets.
# The URL for your GitHub Enterprise appliance:
SOCIAL_AUTH_GITHUB_ENTERPRISE_URL = "https://git.example.com/"

# Set the API URL for your GitHub Enterprise appliance:
SOCIAL_AUTH_GITHUB_ENTERPRISE_API_URL = "https://git.example.com/api/v3/"

# Fill the Client ID and Client Secret values from GitHub in the settings:
SOCIAL_AUTH_GITHUB_ENTERPRISE_KEY = ""
SOCIAL_AUTH_GITHUB_ENTERPRISE_SECRET = ""
Gitlab OAuth2
Instructions are provided here. Basically:
- You need to register an application, be sure to add the
read_userscope. If you needapi, add it to (you shouldn’t). - Set the callback URL to
http://registry.domain/complete/gitlab/. The URL must match the value sent. If you are having issues, try adjusting the trailing slash or http/https/. - In your
secrets.pyfile under settings, add:
SOCIAL_AUTH_GITLAB_KEY = ''
SOCIAL_AUTH_GITLAB_SECRET = ''
Where the key and secret are replaced by the ones given to you. If you have a private Gitlab, you need to add it’s url too:
SOCIAL_AUTH_GITLAB_API_URL = 'https://example.com'
Bitbucket OAuth2
We will be using the bitbucket backend for Python Social Auth.
First, register a new OAuth Consumer by following the instructions in the Bitbucket documentation. Overall, this means registering a new consumer, and making sure to add the “account” scope to it. You can find the button to add a consumer in your BitBucket profile (click your profile image from the bottom left of the dashboard.
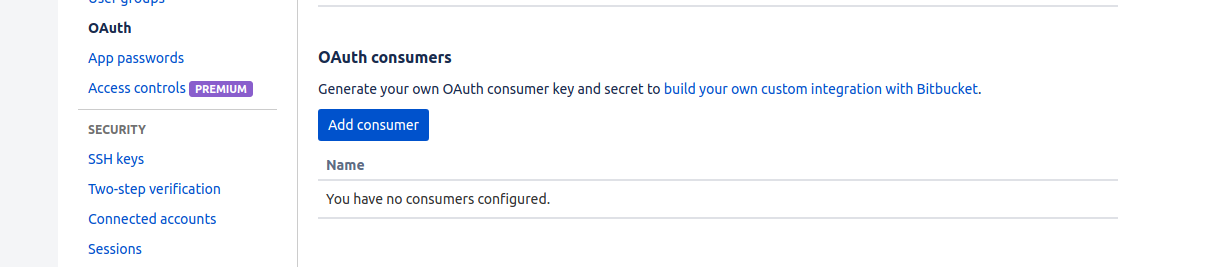
After clicking the button, fill in the following values:
- Name: choose a name that will be easy to link and remember like “Singularity Registry Server”
- Callback URL: should be
http://[your-domain]/complete/bitbucketFor localhost, this is usuallyhttp://127.0.0.1/complete/bitbucket - Keep the button “This is a private consumer” checked.
- Under Permissions (the scope) click on Account (email, read, write).
Then, when you click to add the consumer, it will take you back to the original pacge. To get the key and secret, you should click on the name of the consumer. Then add the following variables to your secrets.py file under settings:
SOCIAL_AUTH_BITBUCKET_OAUTH2_KEY = '<your-consumer-key>'
SOCIAL_AUTH_BITBUCKET_OAUTH2_SECRET = '<your-consumer-secret>'
- Optionally, if you want to limit access to only users with verified e-mail addresses, add the following:
SOCIAL_AUTH_BITBUCKET_OAUTH2_VERIFIED_EMAILS_ONLY = True
Finally, don’t forget to enable the bitbucket login in settings.py:
ENABLE_BITBUCKET_AUTH=True
Setting up Twitter OAuth2
You can go to the Twitter Apps dashboard, register an app, and add secrets, etc. to your secrets.py:
SOCIAL_AUTH_TWITTER_KEY = ''
SOCIAL_AUTH_TWITTER_SECRET = ''
Note that Twitter now does not accept localhost urls. Thus,
the callback url here should be http://[your-domain]/complete/twitter.
Google Analytics
If you want to add a Google analytics code, you can do this in the settings.py:
GOOGLE_ANALYTICS = "UA-XXXXXXXXX"
The default is set to None, and doesn’t add analytics to the registry.
Domain Name
A Singularity Registry Server should have a domain. It’s not required, but it makes it much easier for yourself and users to remember the address. The first thing you should do is change the DOMAIN_NAME_* variables in your settings settings.py.
For local testing, you will want to change DOMAIN_NAME and DOMAIN_NAME_HTTP to be localhost. Also note that I’ve set the regular domain name (which should be https) to just http because I don’t have https locally:
DOMAIN_NAME = "http://127.0.0.1"
DOMAIN_NAME_HTTP = "http://127.0.0.1"
#DOMAIN_NAME = "https://singularity-hub.org"
#DOMAIN_NAME_HTTP = "http://singularity-hub.org"
It’s up to the deployer to set one up a domain or subdomain for the server. Typically this means going into the hosting account to add the A and CNAME records, and then update the DNS servers. Since every host is a little different, I’ll leave this up to you, but here is how I did it on Google Cloud.
Registry Contact
You need to define a registry uri, and different contact information:
HELP_CONTACT_EMAIL = 'vsochat@stanford.edu'
HELP_INSTITUTION_SITE = 'https://srcc.stanford.edu'
REGISTRY_NAME = "Tacosaurus Computing Center"
REGISTRY_URI = "taco"
The HELP_CONTACT_EMAIL should be an email address that you want your users (and/or visitors to your registry site, if public) to find if they need help. The HELP_INSTITUTION_SITE is any online documentation that you want to be found in that same spot. Finally, REGISTRY_NAME is the long (human readable with spaces) name for your registry, and REGISTRY_URI is a string, all lowercase, 12 or fewer characters to describe your registry.
User Collections
By default, any authenticated user in your Registry can create collections, and decide to make them public or private. If you would prefer to revoke this permission (meaning that only administrators can create and manage collections) then you would want to set this variable to False.
# Allow users to create public collections
USER_COLLECTIONS=True
Setting USER_COLLECTIONS to False also means that users cannot create Teams, which are organized groups of users that then can be added as contributors to individual collections. With this setting as True, any authenticated user, staff, or administrator can create and manage new collections and teams, and this is done by issuing a token.
Finally, you can also allow users to create collections, but limit the number created.
# Limit users to N collections (None is unlimited)
USER_COLLECTION_LIMIT = None
The default is None, meaning that users can create unlimited collections, given that USER_COLLECTIONS
is True. If you set this to a non-zero positive integer, user collections will be limited to
this number. If a user is staff or an administrator, they are not subject to this limit.
Registry Private
By default Singularity Registry will provide public images, with an option to set them to private. If you are working with sensitive data and/or images, you might want all images to be private, with no option to make public. You can control that with the variable PRIVATE_ONLY.
PRIVATE_ONLY=True
The above would eliminate public status and make private the default. Alternatively, if you want to allow for public images but make the default private (and collection owners can make collections of their choice public) set DEFAULT_PRIVATE to True.
DEFAULT_PRIVATE=True
PRIVATE_ONLY takes preference to DEFAULT_PRIVATE. In other words, if you set PRIVATE_ONLY to True, the default has to be private, the change to DEFAULT_PRIVATE is meaningless, and a user cannot change a collection to be public.
Collections Page Display
On the main server’s <domain>/collections page, users will be shown
some limited set of collections, plus those that are private that they own.
Since this could slow down the page if the number is huge, you are given
control of this number:
# The number of collections to show on the /<domain>/collections page
COLLECTIONS_VIEW_PAGE_COUNT=250
For larger registries, it’s recommended to disable this view all together, and encourage users to find containers via “search.” If you think this should be a default, please open an issue to discuss.
View Rate Limits
While it’s unlikely someone would be malicious to request a view, we can’t disregard it completely. For all views, we use django-ratelimit to limit views to a certain number per day based on the ip address. For most views, you can define the variables:
VIEW_RATE_LIMIT="50/1d"  # The rate limit for each view, django-ratelimit, "50 per day per ipaddress)
VIEW_RATE_LIMIT_BLOCK=True # Given that someone goes over, are they blocked for the period?
In the example above, we limit each ip address to 50/day. We block any addresses that go over, until the next period begins.
Container GET Limits
Too many get requests for any particular container, whether stored locally or in Google Storage (Google Cloud Build + GitHub plugin) could lead to a DoS for the server. Thus, we have a limit on the total number of weekly GET requests per container:
# The maximum number of downloads allowed per container, per week
CONTAINER_WEEKLY_GET_LIMIT=100
The Container object has a get_limit and get_count that are adjusted when a
user downloads a container. A weekly cron job will reset the get_count.
Collection GET Limits
It could be the case that a user continually rebuilds containers to get around the single container get limit, in which case we’ve also added a collection weekly get limit.
# The maximum number of downloads allowed per collection, per week
COLLECTION_WEEKLY_GET_LIMIT=100
The Collection object also has a get_limit and get_count that are adjusted when a
user downloads a container, reset by the same cron task.
Disable Building
Disable all building, including pushing of containers and recipes. By default, for a working registry, this should be False.
DISABLE_BUILDING=True
For other disable and limit arguments (for GitHub, creating, or receiving builds) see the Google Build Plugin.
Database
By default, the database itself will be deployed as a postgres image called db. You probably don’t want this for production (for example, I use a second instance with postgres and a third with a hot backup, but it’s an ok solution for a small cluster or single user. Either way, we recommend backing it up every so often.
When your database is set up, you can define it in your secrets.py and it will override the Docker image one in the settings.py file. It should look something like this
DATABASES = {
    'default': {
        'ENGINE': 'django.db.backends.postgresql_psycopg2',
        'NAME': 'dbname',
        'USER': 'dbusername',
        'PASSWORD':'dbpassword',
        'HOST': 'localhost',
        'PORT': '5432',
    }
}
And remember you can set these in the environment too:
- SREGISTRY_DATABASE_ENGINE
- SREGISTRY_DATABASE_NAME (postgres)
- SREGISTRY_DATABASE_USER (postgres)
- SREGISTRY_DATABASE_HOST (db)
- SREGISTRY_DATABASE_PORT (5432)
Logging
By default, Singularity Registry keeps track of all requests to pull containers, and you have control over the level of detail that is kept. If you want to save complete metadata (meaning the full json response for each call) then you should set LOGGING_SAVE_RESPONSES to True. If you expect heavy use and want to save the minimal (keep track of which collections are pulled how many times) the reccomendation is to set this to False.
LOGGING_SAVE_RESPONSES=True
API
To configure your restful API you can set SREGISTRY_API_REQUIRE_AUTH to true.
  'DEFAULT_PERMISSION_CLASSES': (
      'rest_framework.permissions.IsAuthenticated',
   ),
These are important metrics to ensure that your server isn’t subject to a DoS attack. Great job! Let’s now configure your web server and storage.