Teams
To add a level of organization of users, sregistry has created loose groups of users called Teams. A registry admin can create a team, or if USER_COLLECTIONS is True, the an authenticated user can also create them. Creating a team means that the creator (admin or authenticated user) becomes the Owner of the team that can add and remove users. If an admin creates a team for a group of users, he or she must manage it or add a user to the list of owners to do the same. To create a team:
- Click on the “teams” tab in the navigation bar
- Choose a name, team name, and image.
- Decide if your team is “open” or “invite” only
There are two kinds of teams:
- invite only means that an owner must send an invitation link.
- open means that anyone can join the team that is authenticated in the registry.
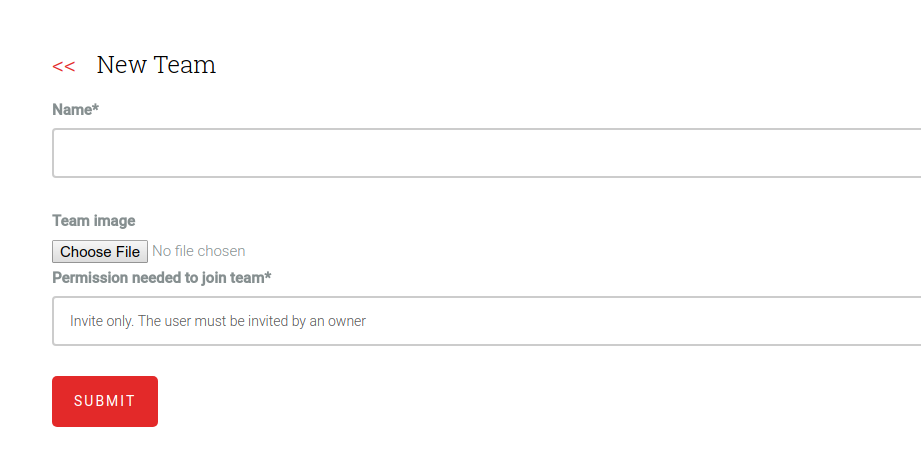
The default setting is “invite.” Teams are important because when you add individuals as collaborators to your collections, they must come from one of your teams, and you do this on each Collection settings page:
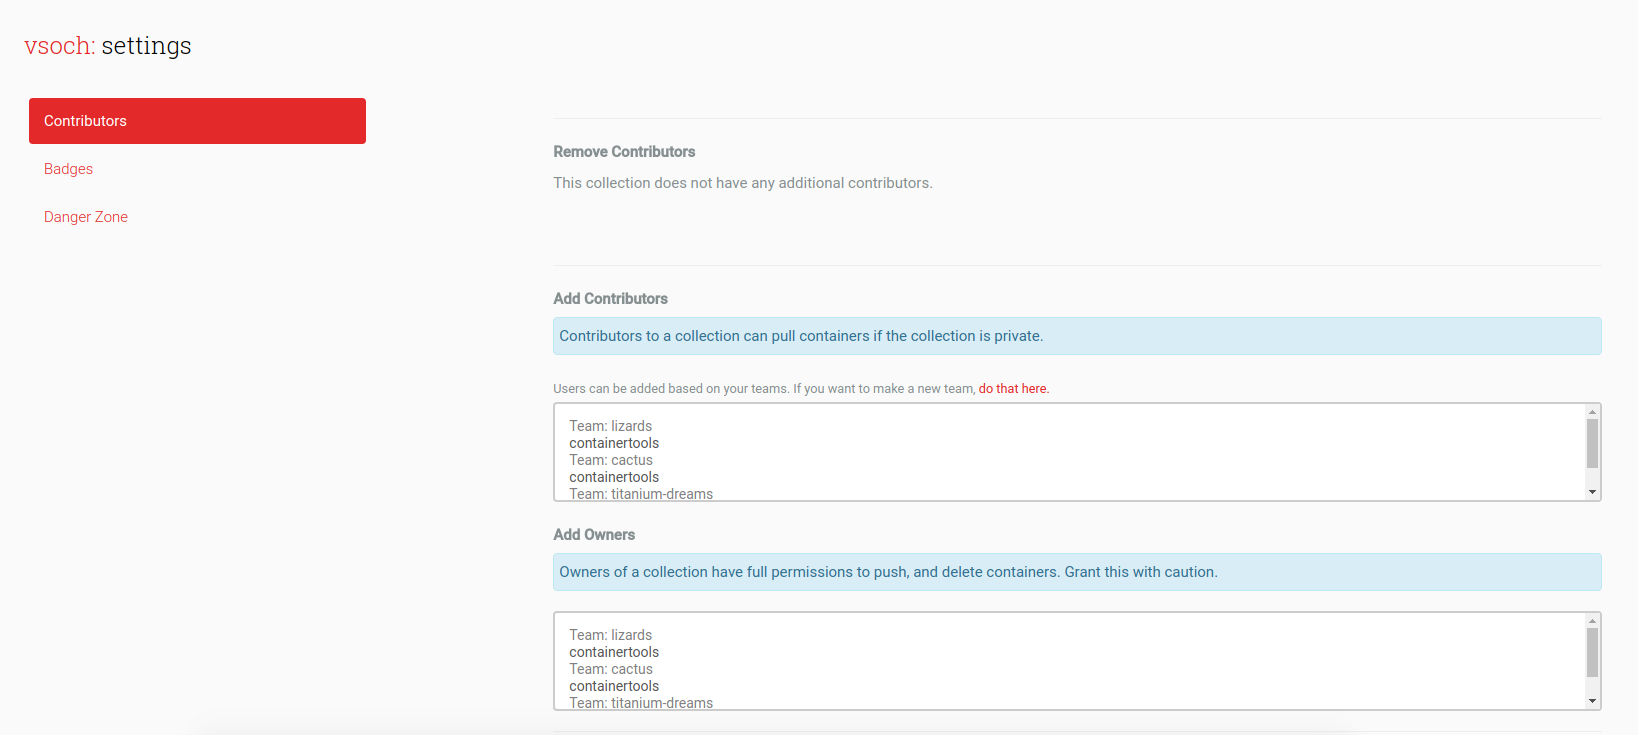
For example, if my lab has a set of users on sregistry and we intend to build images together, we would make a team for our lab, and then easily find one another to manage access to images.
Create Accounts
To create your admin account, the first thing you need to do (in the web interface) is click Login on the top right. You should see the social account options that you configured in the install step. You can now log in with your social account of choice. This will create a user account for yourself that you can use to manage the application, and when you are logged in you should see your username in the top right. It usually corresponds with the one from your social account.
The Application Manager
At this point, you’ve started the application, and created a user with your social auth. Your username is in the top right, and it’s usually the same as your social account. Keep this in mind because you will need it when you shell into the image to make yourself a superuser. Let’s first shell inside:
NAME=$(docker ps -aqf "name=sregistry_uwsgi_1")
docker exec -it ${NAME} bash
you will find yourself in a directory called /code, which is where the main application lives. For administration you will be using the file manage.py to interact with the registry. If you want to see all the different options, type python manage.py and it will show you.
Let’s first make yourself a superuser and an admin, meaning that you are an administrator and have godlevel control of the registry. Just by way of being inside the Docker image you already have that. You will be able to set other people as admins. In summary:
superuser: you are an admin that can do anything, you have all permissions.admin: you can push images, but not have significant impact on the registry application.
Of course anyone that shells into your Docker image could just explode everything - it’s up to you to secure and manage the server itself! Let’s say my username is vsoch. Here is the command I would run to make myself a superuser and admin. Note that we are inside the Docker image sregistry_uwsgi_1:
$ python manage.py add_superuser --username vsoch
DEBUG Username: vsoch
DEBUG vsoch is now a superuser.

$ python manage.py add_admin --username vsoch
DEBUG Username: vsoch
DEBUG vsoch can now manage and build.

# And from outside the Docker image
NAME=$(docker ps -aqf "name=sregistry_uwsgi_1")
docker exec $NAME python /code/manage.py add_superuser --username vsoch
docker exec $NAME python /code/manage.py add_admin --username vsoch
You can also choose to remove a superuser or admin at any time. This means he or she will no longer be able to build and access the token and secret to do so.
# Inside the image
$ python manage.py remove_superuser --username vsoch
$ python manage.py remove_admin --username vsoch

# Outside
NAME=$(docker ps -aqf "name=sregistry_uwsgi_1")
docker exec $NAME python /code/manage.py remove_superuser --username vsoch
docker exec $NAME python /code/manage.py remove_admin --username vsoch
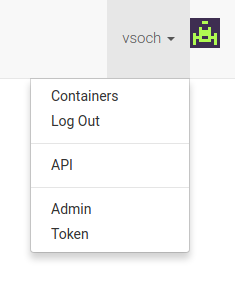
Guess what! You don’t need to continue to manage admins (and other superusers) from the command line after this step. When logged in to your superuser account, you will see an “Admin” link in your profile in the top right:
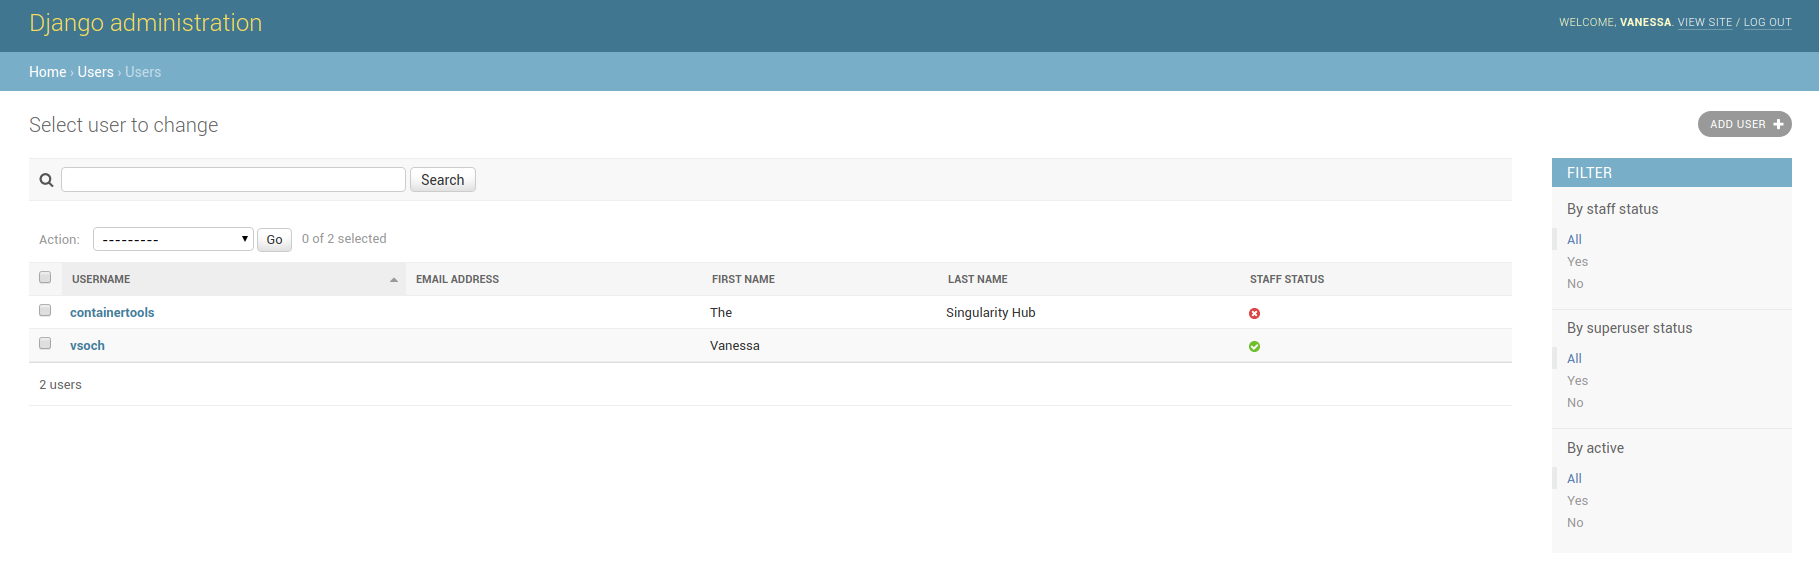
This will take you to the administrative panel. Once there, you can click on “Users” at the bottom of the list, and select one or more checkboxes to assign other users to roles:
Register your registry next!